It’s been over 8 and half year since I released the „Advanced Glass Material Pack” on the Unreal Engine Marketplace. It quickly became popular and it felt really nice when it received good feedback. What’s funnier – some people from the Unreal Engine community started to recognize me as „The Glass Guy”. Recently, I decided to challenged myself again and this time create a procedural stylized/toon glass material.
Why Stylized?
Current game engines such as Unreal and Unity, along with advanced rendering technologies, continually elevate the standards of photorealism in games (or any real-time projects). Moreover, marketplaces and scan libraries like Quixel Megascans provide high-quality content, making photorealistic graphics more accessible than ever before. As a result, we observe an increased number of games being released with high-fidelity graphics. It has become extremely difficult to stand out in this highly competitive and overcrowded field. I believe opting for a stylized art direction can potentially help you get noticed.
As a CG Generalist/Tech Artist, challenging oneself frequently and exploring different ideas/concepts are essential. I’ve set myself a goal: to build an advanced and flexible framework for Unreal Engine users interested in exploring a stylized approach in their projects. Stylized Glass is the first step in this journey.
Fake Reflections
After watching lots of references from anime or cartoons, I quickly realized I couldn’t rely on Unreal’s default reflection data. Lumen or screen-space reflections wouldn’t do the job when aiming to achieve hard-shaped, often fixed patterns on a surface. I decided to use a pre-defined reflection mask and allow the user to specify how it projects onto objects.
- Camera-based projection works the best with curved shapes like bottles, wine glasses, etc.
- Screen-space projection is more effective on flat surfaces like windows.
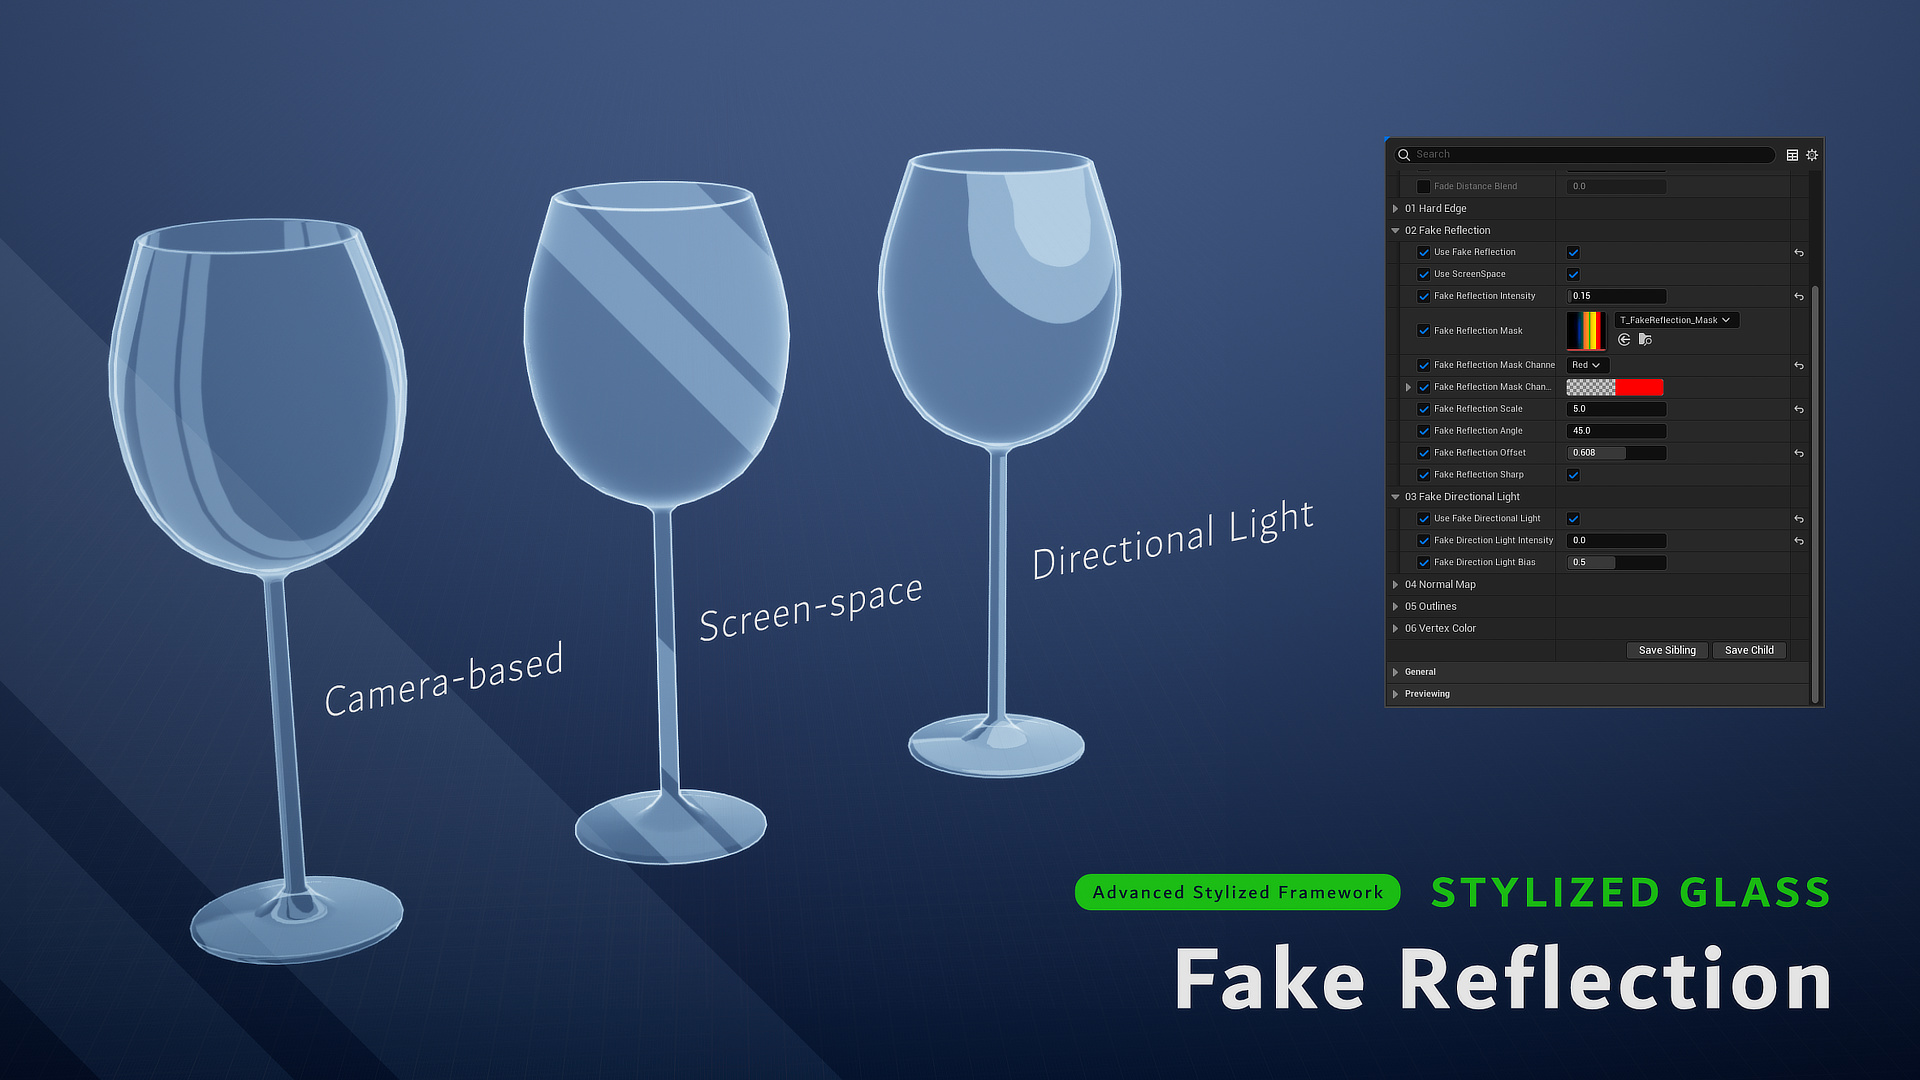
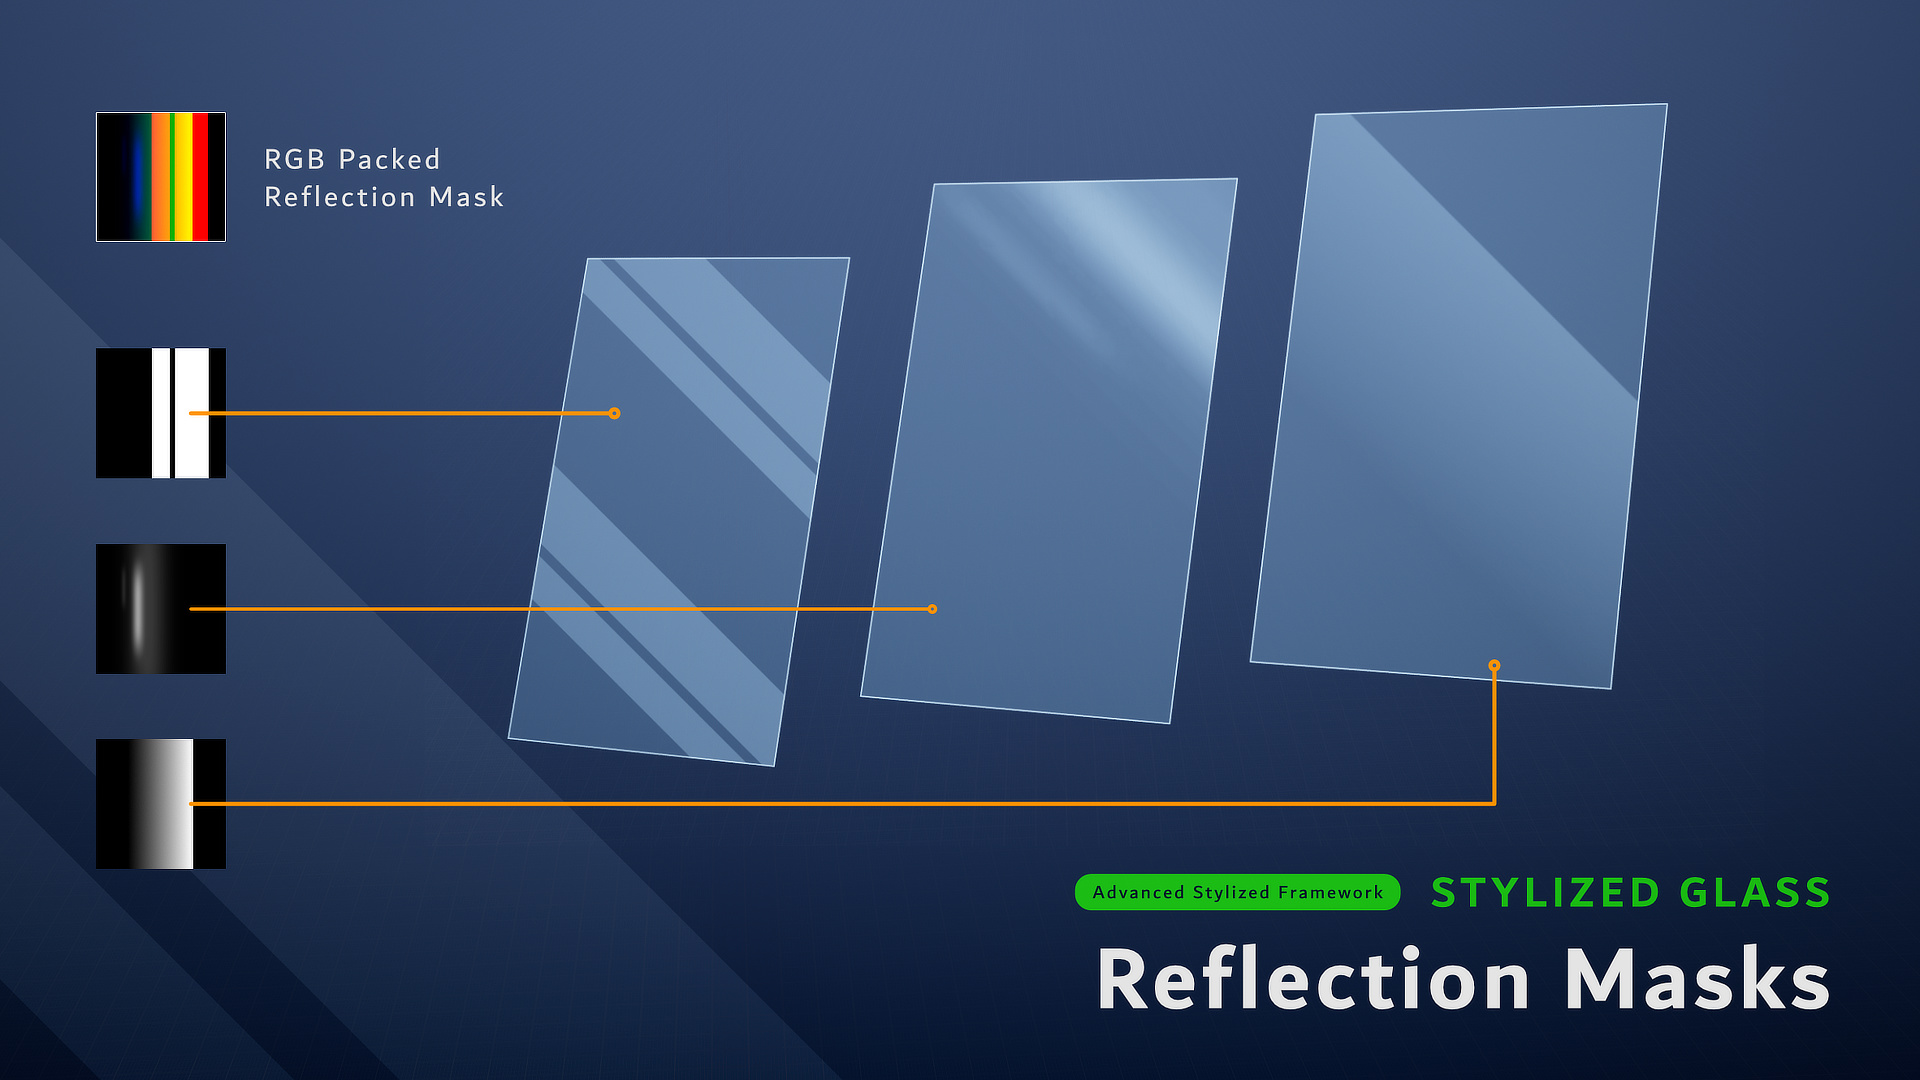
The user can specify an RGB packed texture and control the angle, scale and offset to get the desired results. Additionally, the „Sharp Reflection” option functions as a threshold value for a black-and-white mask, enhancing the pattern sharpness even on low-resolution textures.
Since the shader’s blend mode is additive and it doesn’t utilize scene reflections, I incorporated the „Directional Light” as a source for fake „spec” highlight. The shader calculates a dot product of the object’s surface normal and the directional light angle. To make it more adjustable, I added a bias parameter to control the size of the reflection.
Normal Map
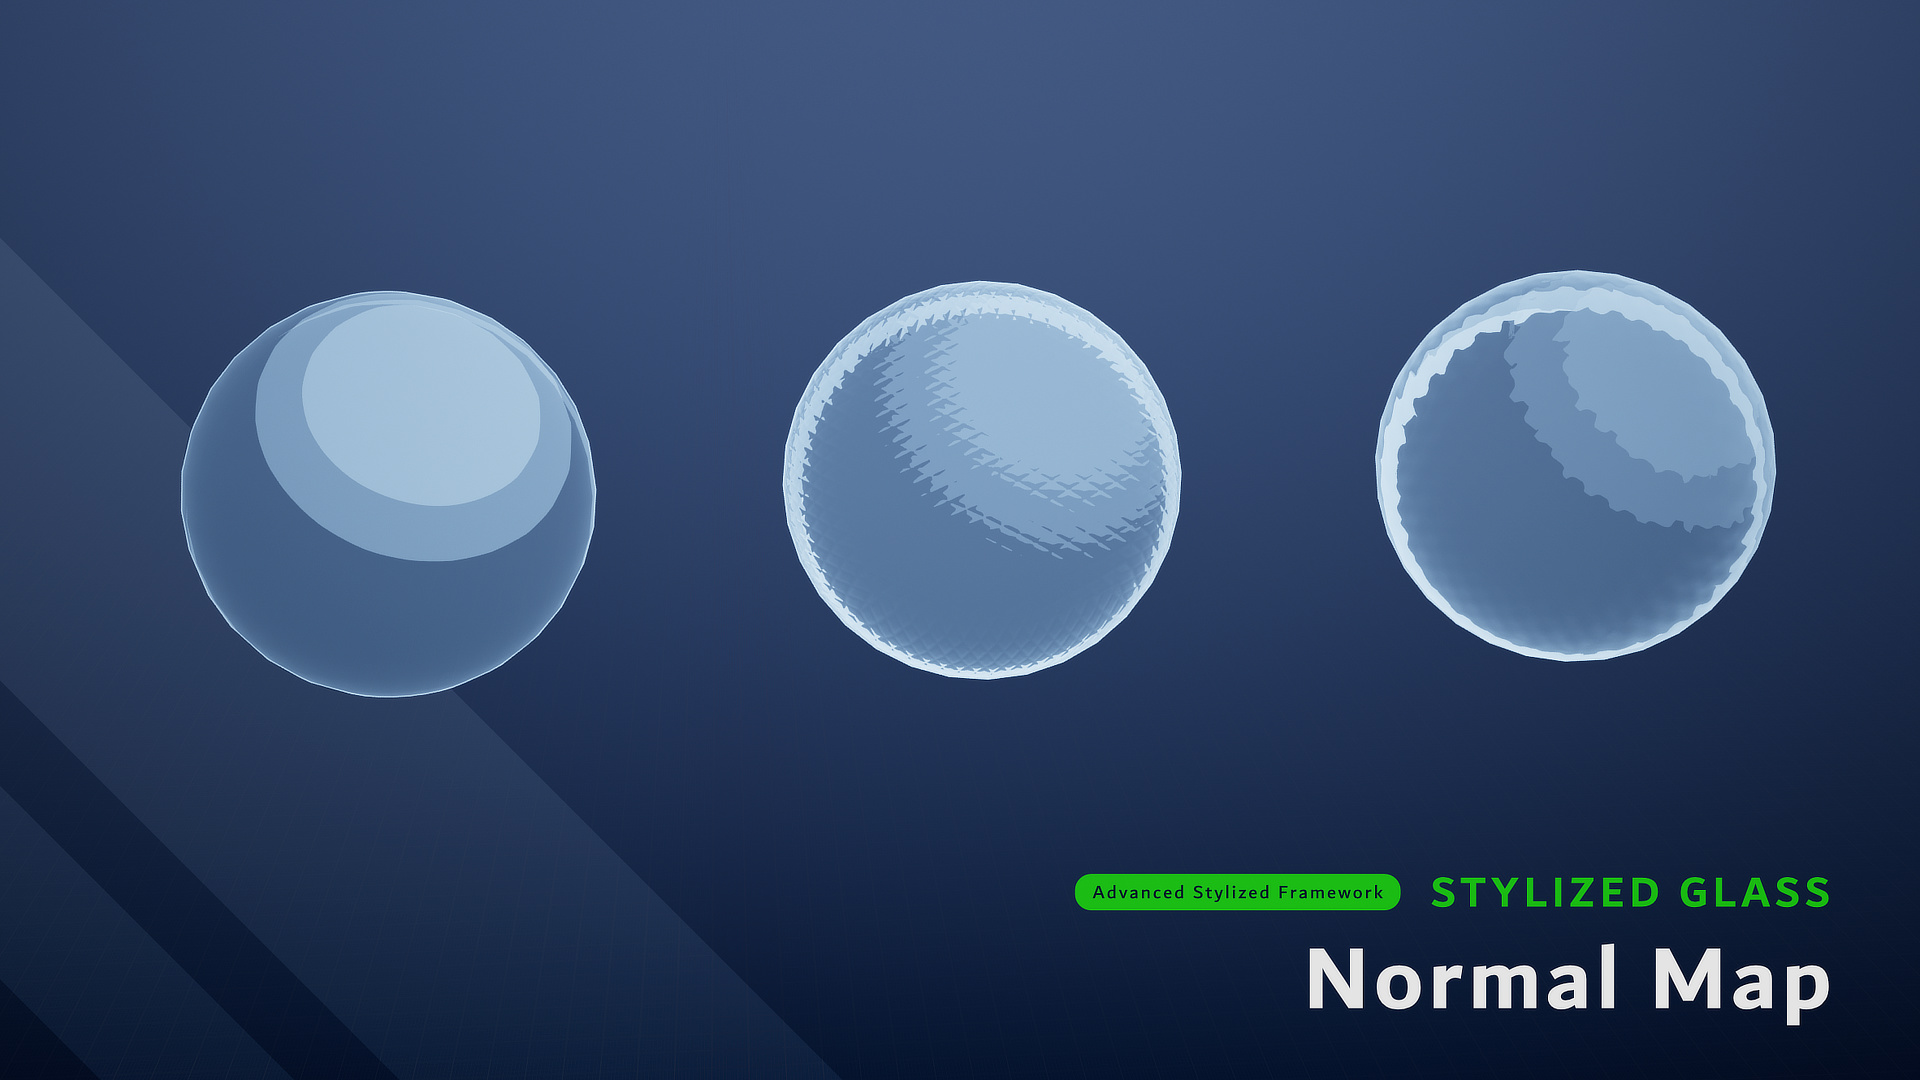
I was exploring different ways to affect the appearance of reflections and hard edges, and applying a normal map seemed like a good idea. Since my goal was to build a fully procedural shader, I didn’t want the user to waste time on creating custom UVs for the mesh. Therefore, I added a triplanar mapping for normal maps with a local scale option. Simple wave or a diamond patterns produce interesting results with slight surface imperfections.
Even more control
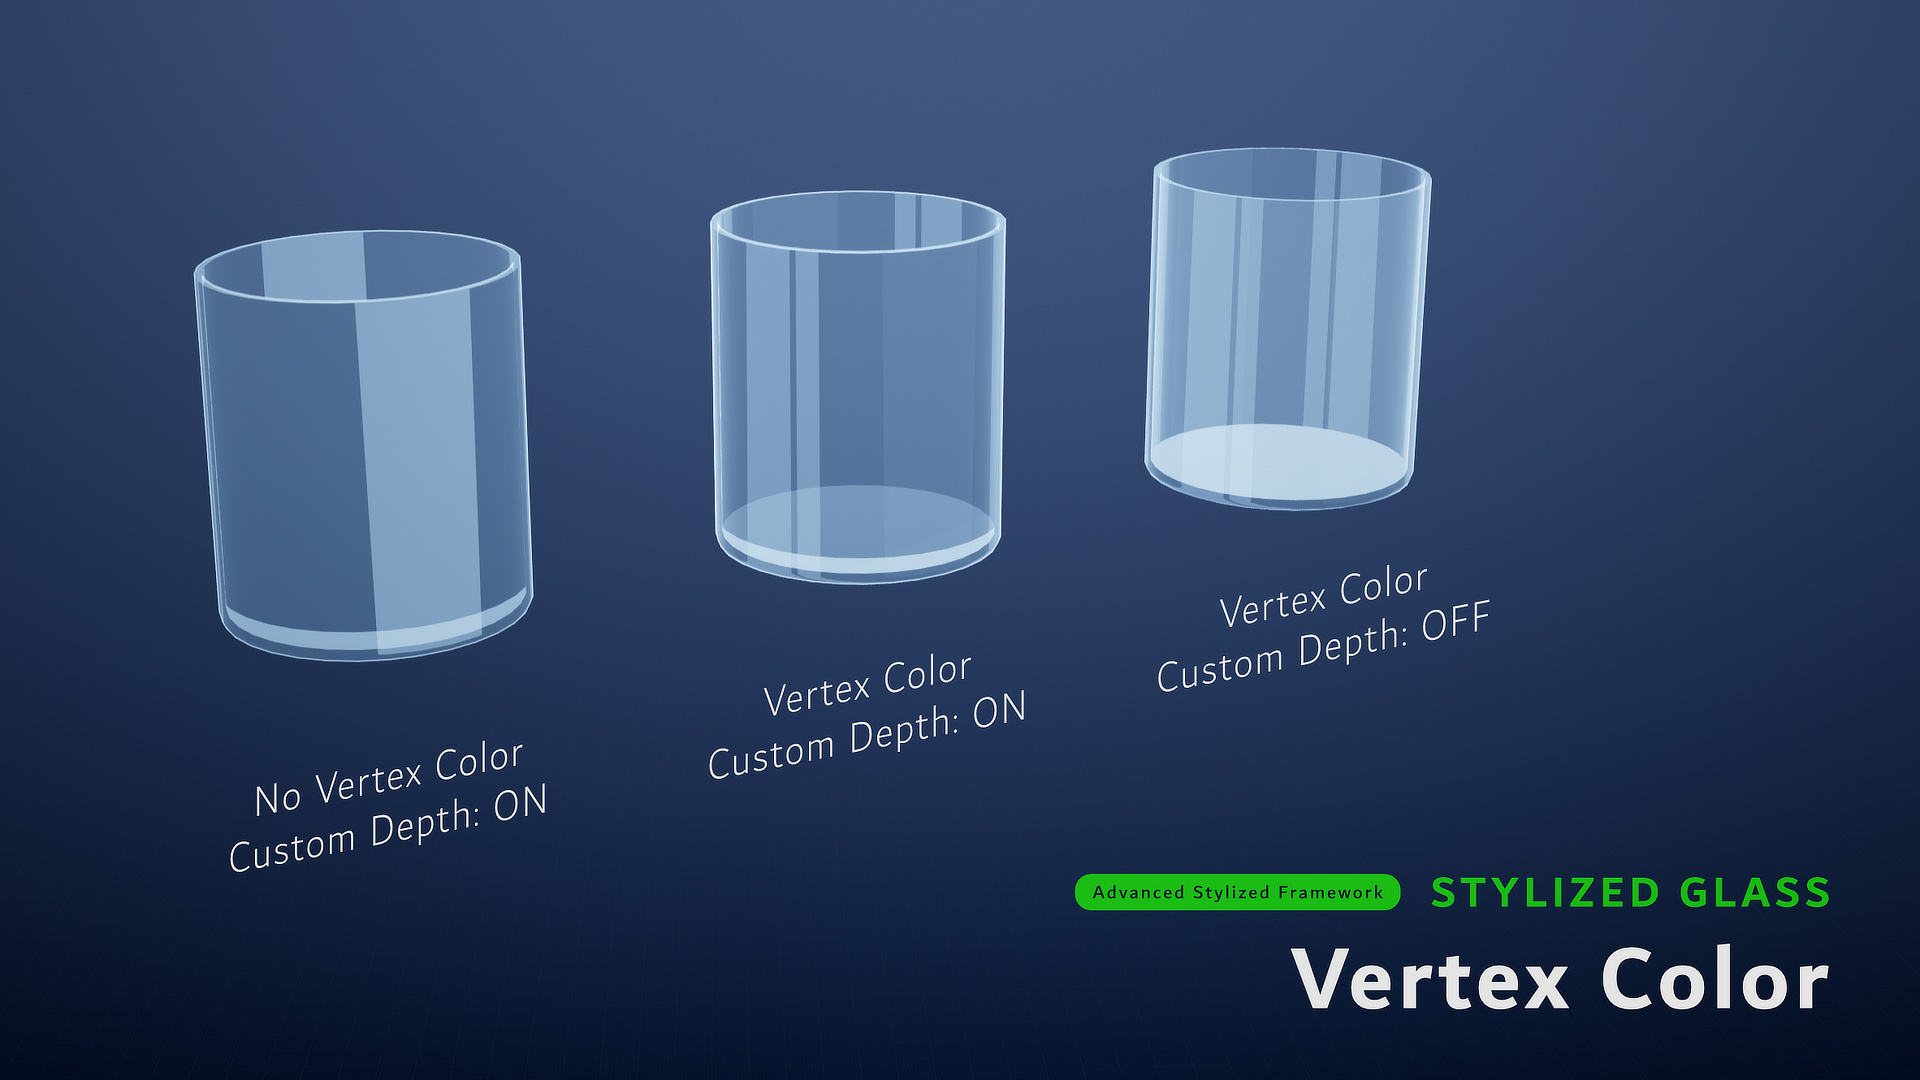
The truth is, the more control you have in a shader, the better you can prepare your assets. I implemented an opacity override feature using vertex color data. This allows you to precisely paint faces on a mesh and determine whether they should be more opaque or not. This feature is especially useful when custom depth is enabled (which is typically recommended for most cases). For instance, a whisky glass is a good example. I painted the bottom of the glass to make its shape more pronounced.
Here’s the list of all parameters:
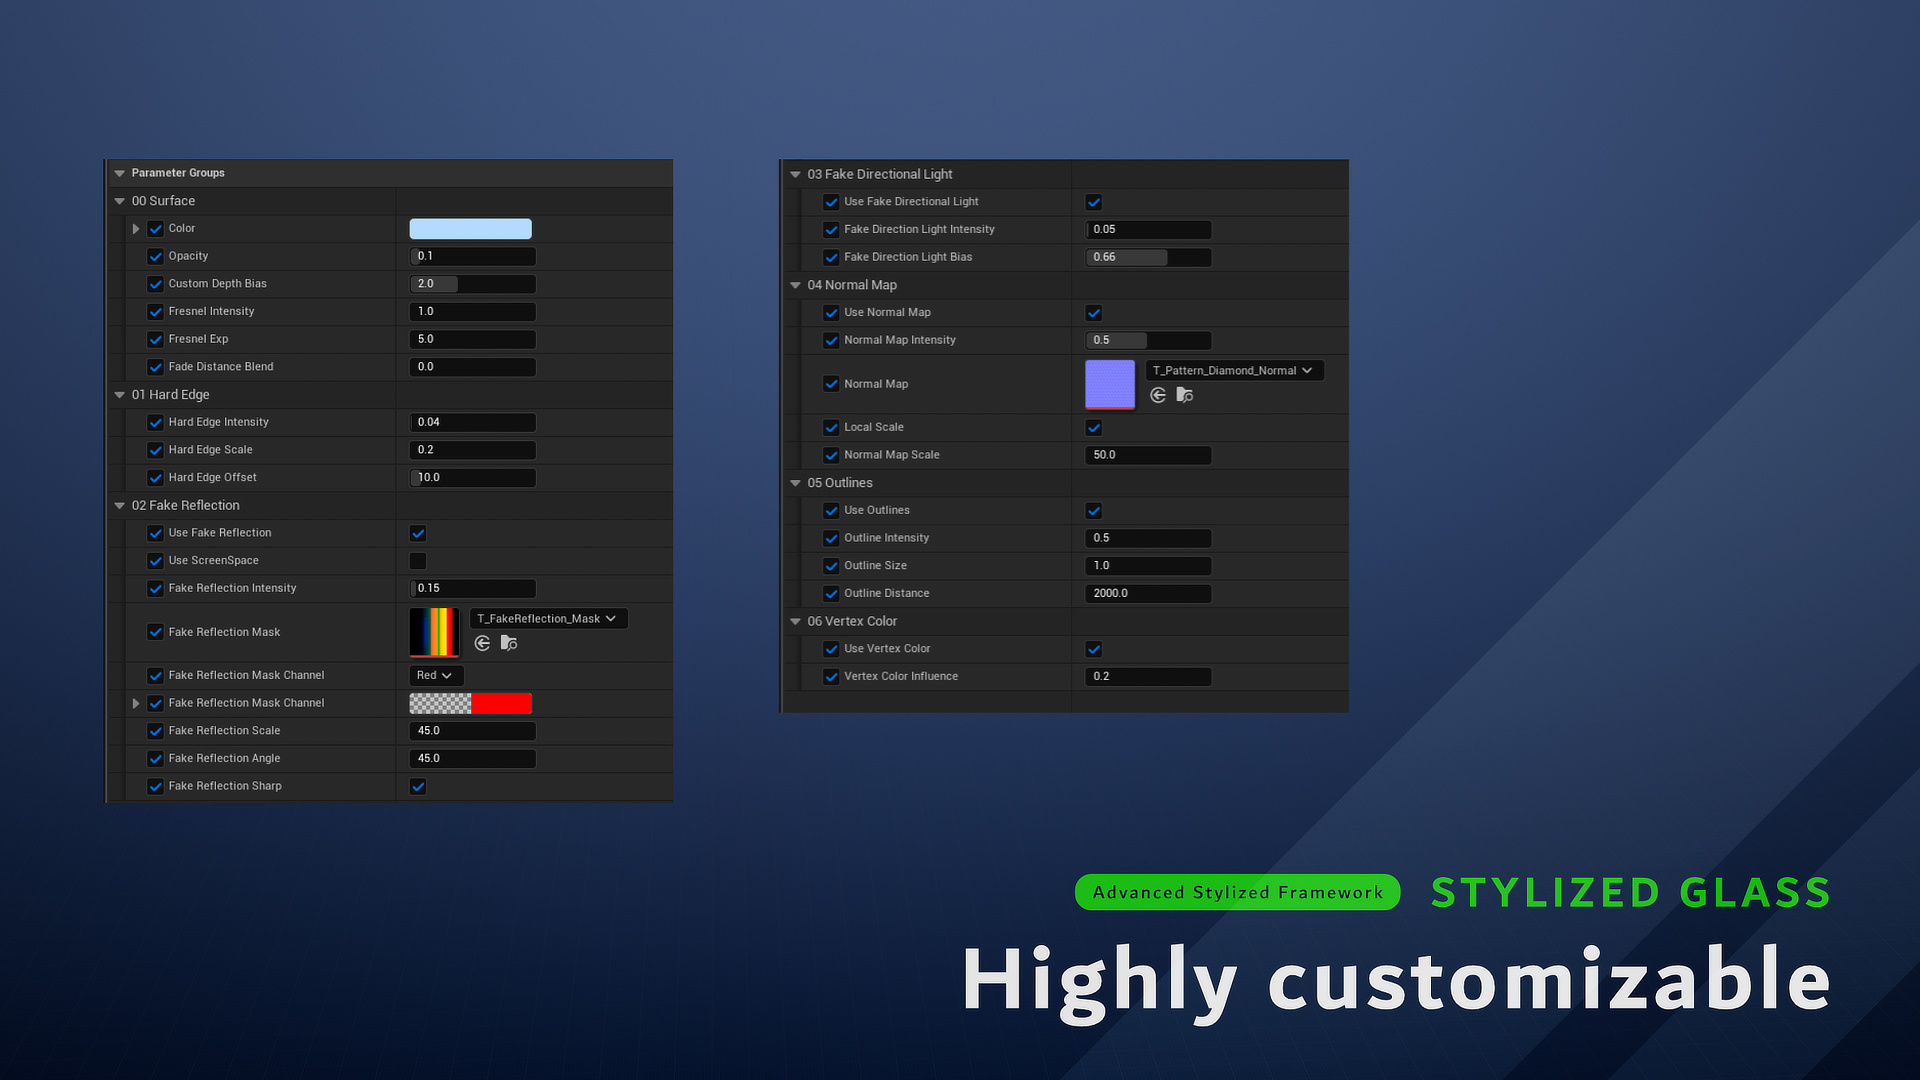
Surface
- Color
- Opacity
- Custom Depth Bias
- Fresnel Intensity
- Fresnel Exp
- Fade Distance Blend
Hard Edge
- Intensity
- Scale
- Offset
Fake Reflection
- ScreenSpace On/Off
- Intensity
- Reflection Mask
- Mask Channel
- Mask Scale
- Mask Angle
- Mask Offset
- Mash Sharp On/Off
Fake Directional Light
- Intensity
- Bias
Normal Map
- Intensity
- Normal Map Texture
- Local Scale On/Off
- Texture Scale
Outline
- Intensity
- Size in pixels
- Distance
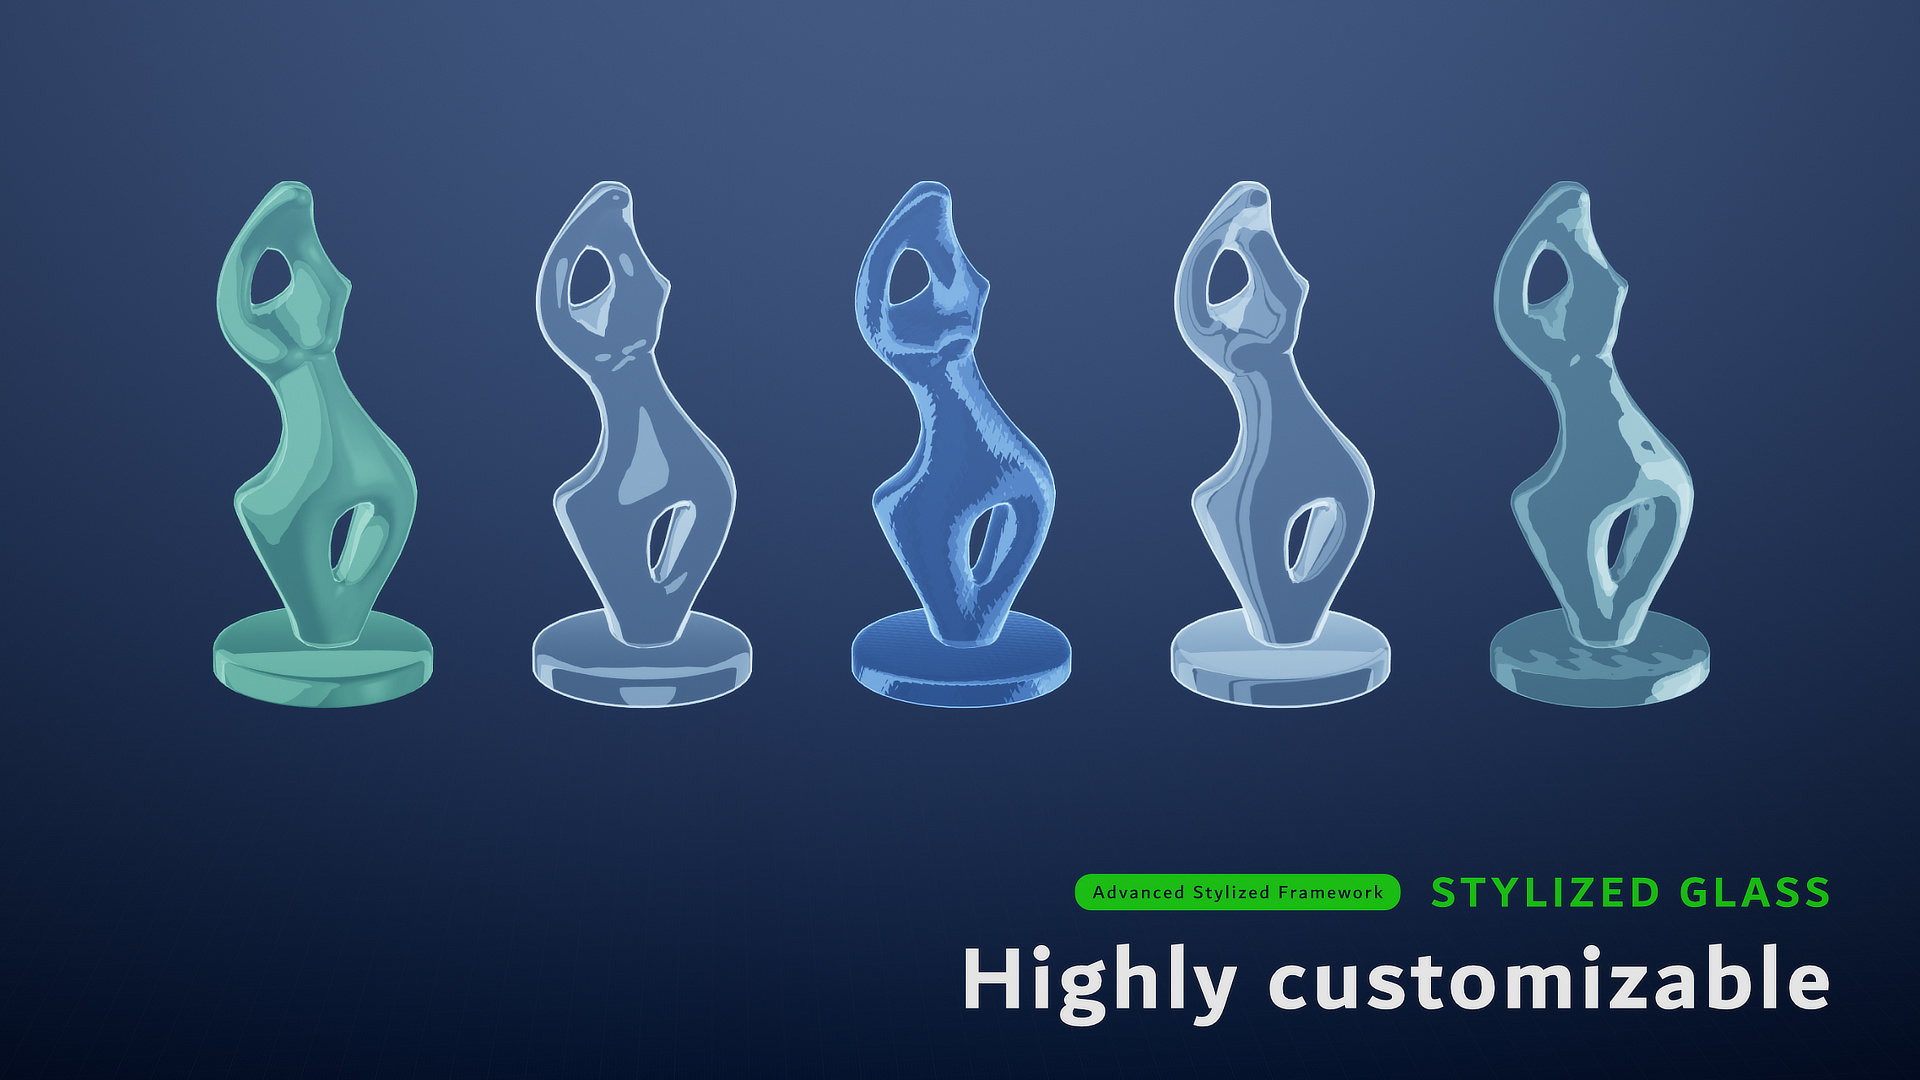
Well, with all the exposed parameters, I can create various glass types in a matter of seconds.
Here are some examples of a statue from Starter Content:
It’s been a lot of fun to create this glass material and I hope you like it.
The shader is available on the Unreal Engine Marketplace: https://www.unrealengine.com/marketplace/en-US/product/stylized-glass